Sunday, January 29, 2012

Cheery Breakfast Nook

Today we had the final install of my first official (and paying!) clients' breakfast nook!  When I first met with Susie, she had already repainted the kitchen as well as upgraded the counters to granite, added plantation shutters on the bottom half of the windows, as well as a few other things.  She wasn't quite sure what to do next, but with her blessing, I was given full creative control of the area!  We talked about colors, geometric patterns, and sunlight!

Here is the final product, which we are both very happy with!  I am still waiting to hear her husband's verdict once he returns home this evening!


Here is the original concept board I presented to her:


Okay, before we really get started, check out the before pictures:
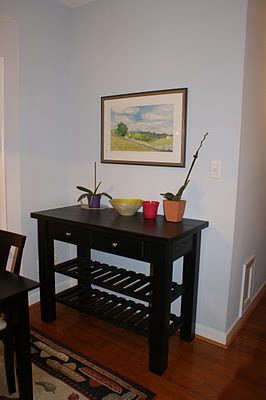


And now, for the after...


We used a bold color and design on the floor to brighten up the room.  The chairs were recovered with another fun geometric print.  The window treatments were definitely a major focal point in the space.


The window treatments were hung higher than the window frame to allow in more sunlight and utilize the full height of the room.


Susie's mother had previously given her a beautiful painting of her hometown (see below).  I made sure to incorporate the colors by choosing accessories that were complimentary and would make it pop!


So, what do you think?
Thursday, January 5, 2012

DIY: Pinterest Sentiment Ornament

Don't you just want to thank your lucky stars for Pinterest?  I knew I had saved all of my friends' wedding invitations for a reason as soon as I saw this picture!

It is absolutely SO EASY and made the best gift.  Everyone that received one loved it and I think I even surprised some of them by keeping their invites.  Most of my friends didn't realize what it was!

What you need:


  • Wedding invite or something sentimental to shred
  • Straight edge paper cutter
  • Scissors
  • Ribbon
  • Empty large glass ball ornament that you can fill
How to make:
  • Shred the invitation
  • Make sure you slice right in between where the writing is so it is legible inside of the ornament

  • Curl each piece of paper as if it were ribbon

  • Wrap it around your finger to create a tighter curl


  • Insert all curls into the ornament


Ta-Dah!


PS.  Shannon, I made you & Zac a Christmas ornament :)

Wednesday, January 4, 2012

Anthropologie: St. Louis

You know I couldn't visit a big city without dropping in on Anthropologie!  My BFF took me to a HUGE mall that we ended up staying in for five hours!  What did you expect when it was my first trip out of town without the babies?  Needless to say, their location did not disappoint.  Take a peek!


Distressed cabinets with two different paint colors.  Mustard yellow and olive green - delicious.


These glass paneled cabinets had line drawings inserted behind them.  
Great idea for a simple update or holiday decor!


Paper chains made with LOTS of paper and LOTS of staples.  I am thinking of using this for garland - perhaps next year's tree should be white and gold?


This "light fixture" was tons of ornaments grouped together by hanging them with long strings from one central point.  There was a strand of Christmas lights balled in the center to illuminate the ornaments.  
Simple and genius!

Tuesday, January 3, 2012

STL: Belated Holiday House Tour

For my first girls weekend away from the babies (14 and a half months after having them), I got on a plane to visit my BFF in St. Louis!  She had an amazing jam-packed weekend planned for us to relax, catch up, and see the city!  I was surprised to see a lot of the same style architecture as there is in Richmond, just on a larger scale.

One of the many things she planned was the Lafayette Square Holiday House Tour.  We were able to walk around Lafayette Square with our map and pick which houses we wanted to tour.  The first house we chose was the home of an artist!


I LOVE the bird cage decor hanging in the front living room.


I think I will make these ornaments next year with our family members' names on them.  So sweet.


The only other house I photographed (that we were dying over), is a friend of Judy's who actually used to live in Richmond.  She has impeccable taste, amazing fixtures (of course I would be taking note of plumbing and lighting fixtures during a holiday tour), and a BEAUTIFULLY decorated home.  


Kitchen hutch with cookbooks organized by color.  Gotta love ROYGBIV.


Large plantation shutter doors as decor flanking a small table - love the drama


How could I not photograph this eye-catching chandelier?  It was such a work of art! 


Holiday candy in hurricane globes - always a fave


I don't think I will ever get sick of a copper farm sink and bridge faucet.  In case you are wondering, the sink is Stone Forest and the faucet is ShowHouse by Moen.


Perfect place for a chalkboard door - the pantry.  I couldn't help but snap a pic of the "Go Hokies!"


The greenery centerpiece is perfection.

Next year, I plan to visit Richmond's tour - did you snoop around anyone's home this year for decorating ideas?  

Monday, January 2, 2012

DIY: Anthropologie Inspired Initial Ornament

I know, I know.  Christmas is over.  But, perhaps you need a gift to send to someone or for a belated gift exchange?  Well, tardy seems to be the trend for me as a new mom, so I figured since these aren't exactly holiday-only themed, this post is still valid.  When my friend Meghan and I spotted them in Anthro, we knew we had to attempt them!  The cost ended up being about the same for one, but once you have the supplies, you can reproduce them for the cost of only the letter itself :)


What you will need:


  • A French book (I scored one at a book consignment shop for 5.00 but justified the cost because I can use it to make twenty of them if I so choose)
  • A letter shaped ornament (Target, 2.00)
  • Mod-Podge (already owned)
  • Ribbon (already owned)
  • Paintbrush to apply Mod-Podge (already owned)
  • Sheet of white cardstock (already owned)
What I did:
  • Trace the foam letter twice on white cardstock
  • Glue the white cardstock to each side of the letter to make the base of it white.  This is probably not necessary if you use a white or wood base letter.
  • Rip a few pages out of the book.  Rip off the side, top and bottom margins and discard.  
  • Tear the margin-less page into thin long strips to wrap the ornament with.
  • Generously apply the Mod-Podge to one side of the strips and begin wrapping the ornament.  Layer all the way around the ornament.
  • Adorn with a ribbon as a finishing touch.  You can either tie it in or poke holes in the ornament and thread through.


I think these would be fab over a wine bottle as a hostess gift, or even just hanging on a door knob in your home.  They were very easy - or should I say, tres facile?